Facebook offers authentication using OAuth 2.0.
Butler Auth configuration
The settings in the config file are:
facebook:                           # "Facebook" OAuth2 provider
    enable: false
    userDirectory: lab              # Qlik Sense user directory that will be used for the authenticated user
    userIdShort: true               # If true, the email domain will be removed. I.e. "joe.smith@domain.com" will be changed to "joe.smith".
    clientId: <Client ID>
    clientSecret: <Client secret>
| Field | Description |
|---|---|
| enable | Enable or disable this authentication provider. true/false. |
| userDirectory | The Qlik Sense Enterprise user directory that will be used once the user has been authenticated by the authentication provider. |
| userIdShort | The provider will return the user’s email address. If userIdShort is set to true, the @ character and email domain will be stripped from the email address returned by the provider. For example, “joe@company.com” would become just “joe”. true/false. |
| clientId | Client ID from Facebook |
| clientSecret | Client secret from Facebook |
Facebook configuration
General steps to set up Facebook Login for use with Butler Auth.
Create application
-
Log in to Facebook’s developer site https://developers.facebook.com.
-
Go to the applications section, then create a new application:
“Create App” > “Build Connected Experiences” > Enter app name and contact email > “Create App” > “Not a robot..”. -
Add the Facebook Login product to the newly created app:
Click “Set Up” on the Facebook Login product > “Other” as platform. -
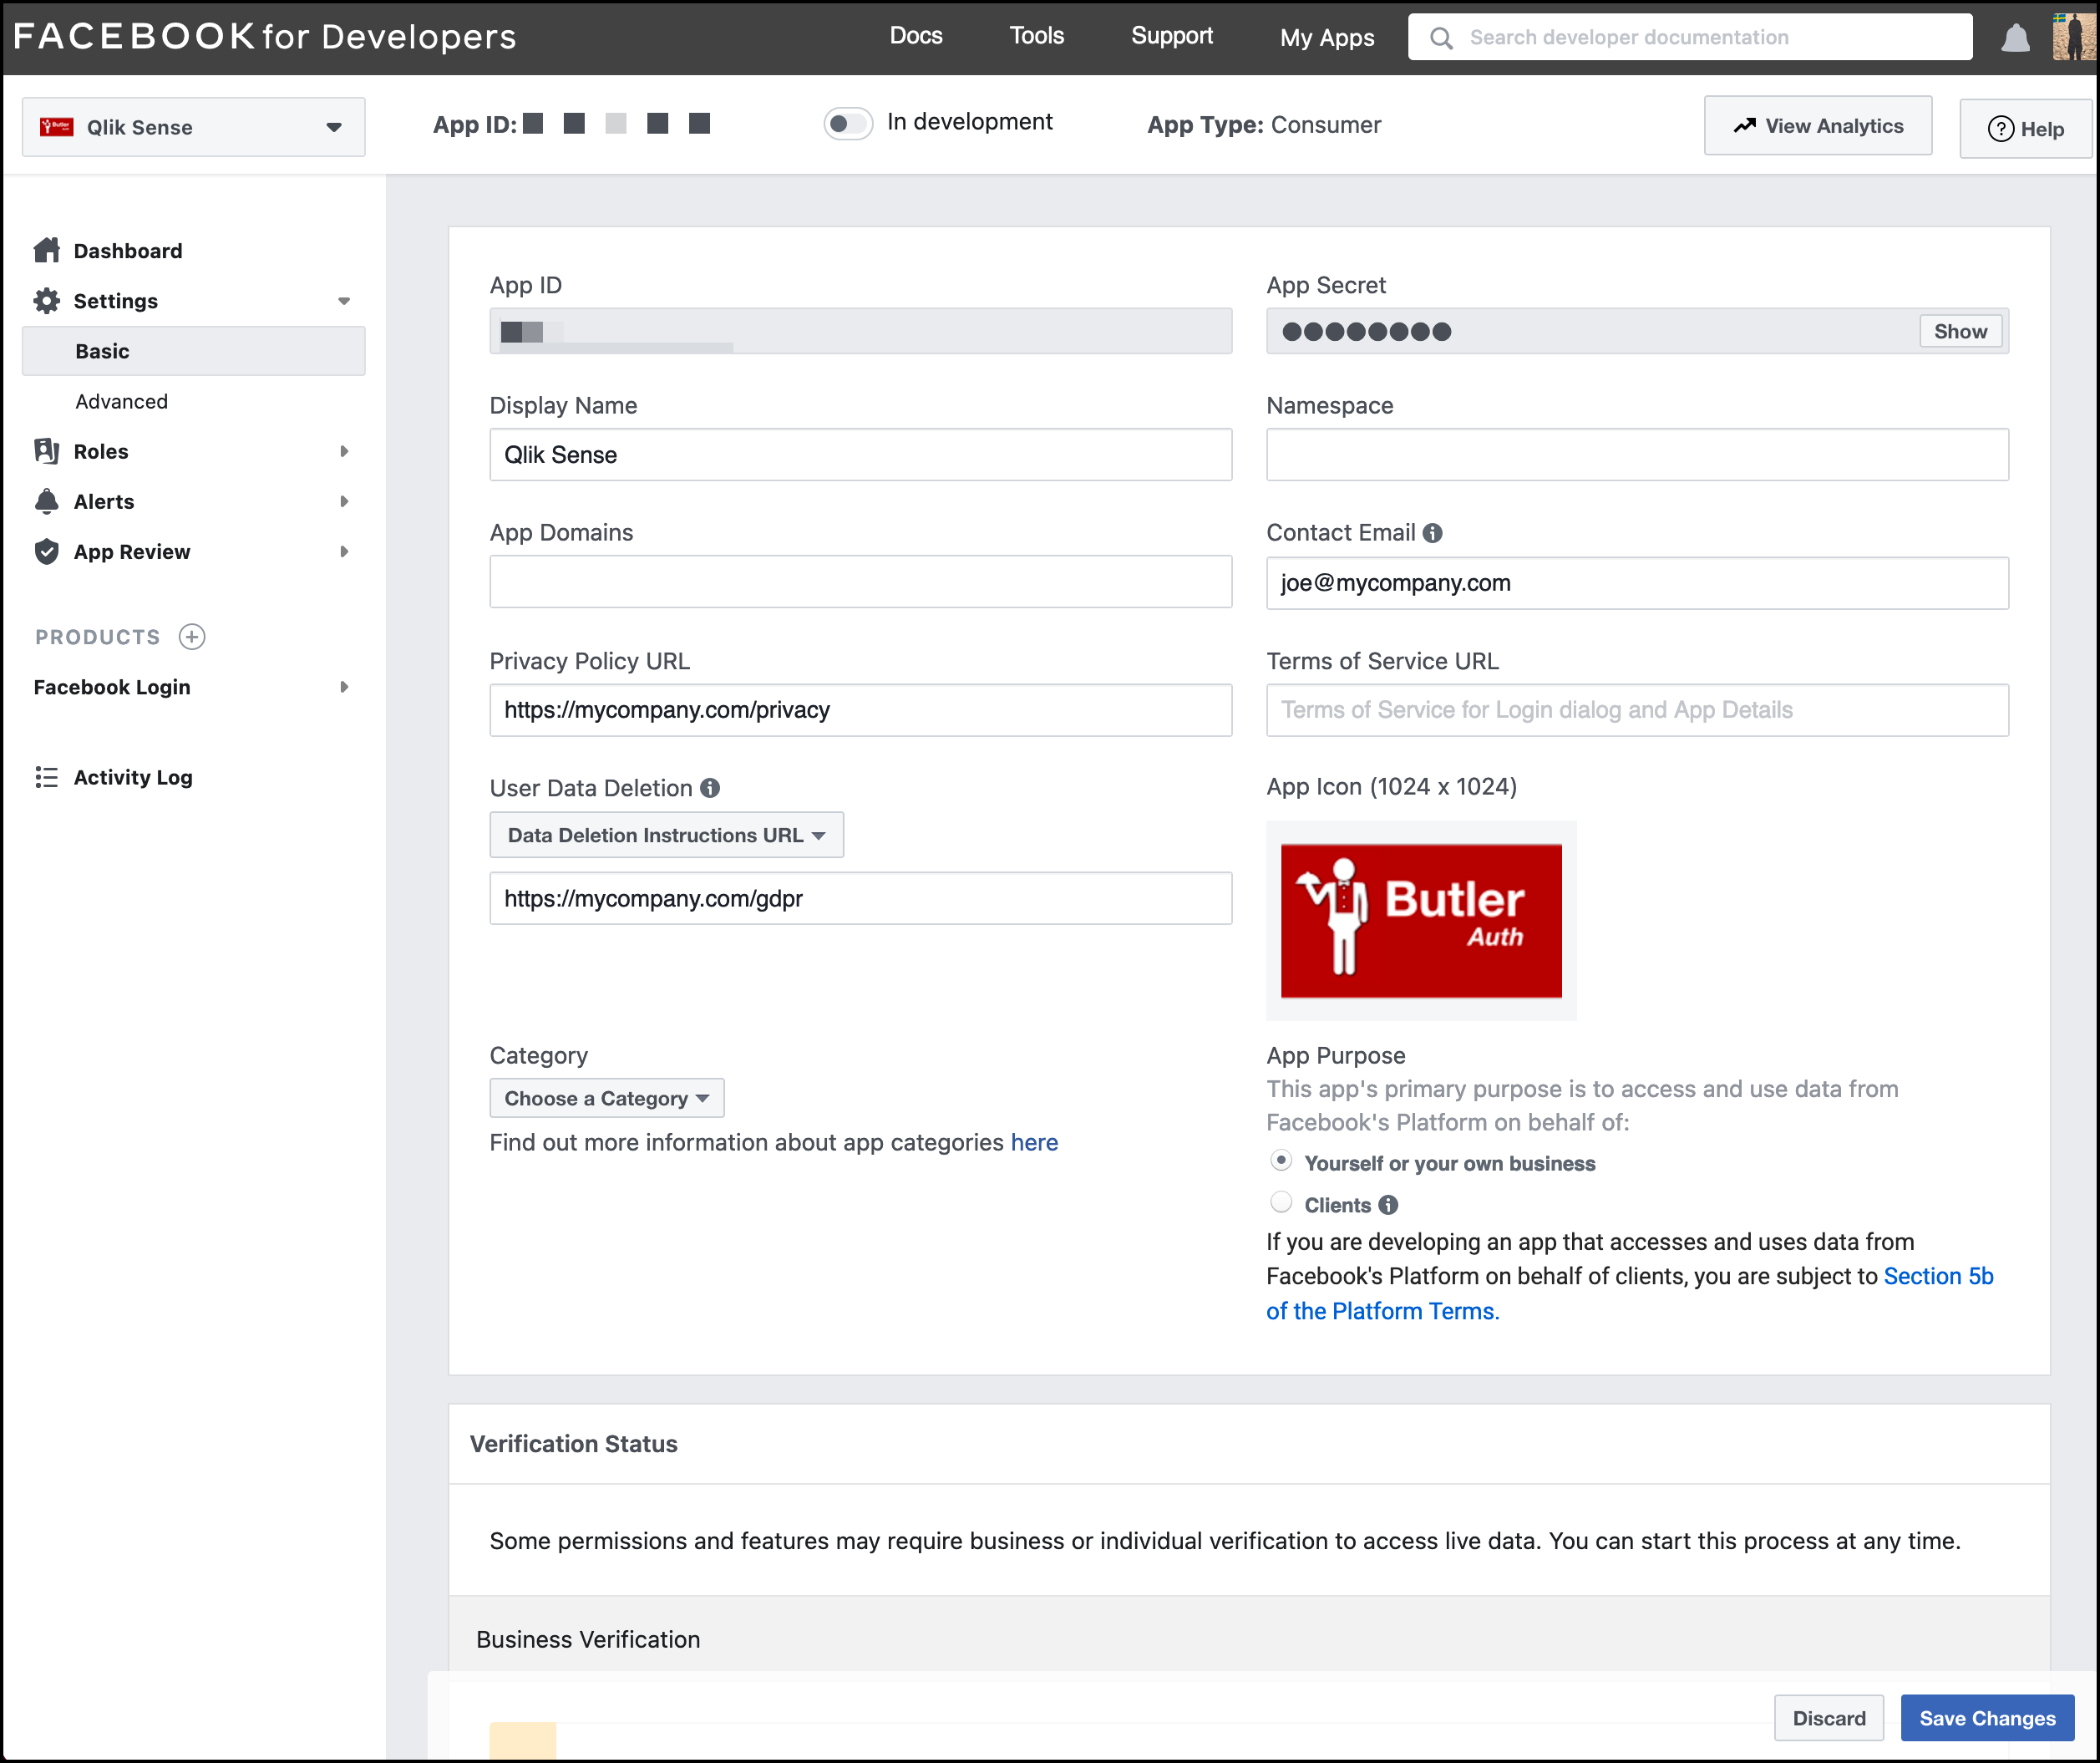
Open the basic settings:

- Set a “Display Name”.
- Enter a relevant “Contact Email” address.
- Enter a link for your “Privacy Policy URL”.
- Enter a link to your GDPR policy (or similar).
- Upload an app icon. It will be shown to users when authenticating via Facebook.
- Review remaining fields and fill in as needed for your specific use case.
-
Copy the
App IDandApp Secretfrom the screen above to the Butler Auth config file.